Admin Guide – Trainings Overview
What Are the Different Training Types?
The LMS has three different types of trainings available for use. The first type is an online training that employees can register for and take on either this platform or via an external site. The second type of training is an in-person training that has specified dates and locations that an employee can choose from and register for on the LMS. After an employee registers for this type of training, they will receive a confirmation email of the date and time of the training, which can also be found on the course homepage or their user dashboard. The last type of training is a webinar, which functions in the same way as an in-person training, only it is broadcasted on the internet on a certain day and time rather than at a facility.
How Do I Find a Training?
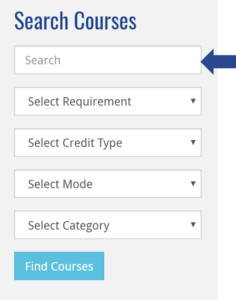
Employees can browse through a list of various trainings by visiting the training catalog, which can be accessed from the main navigation menu on the LMS. Here, they will have the ability to use a range of different filters (free text search field, requirements, credit type, mode, and category).
Step 1) Go to the LMS
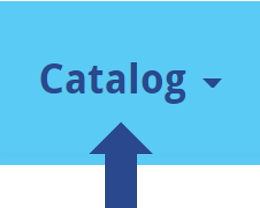
Step 2) Hover over “Catalog” on the main menu
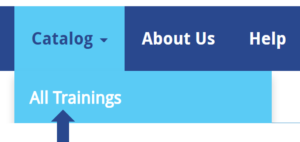
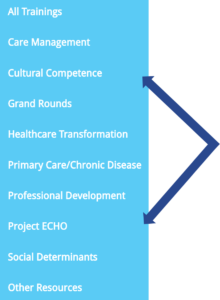
Step 3) Select “All Trainings” or choose a specific category from the list
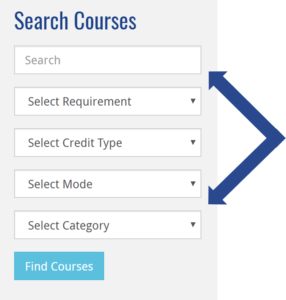
Step 4) Choose from the listed courses or use the “Search Courses” field to find a specific training

What Are Training Initiatives and How Do I Access Them?
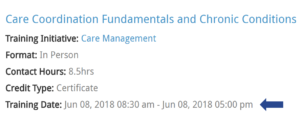
For trainings that fall within a specific initiative, employees will have the ability to select the relevant initiative name after hovering over the “Catalog” main menu item. For example, selecting “Care Management” will take you to the Care Management page. Here, employees can view details about the category, such as a description of the initiative and the core audience, learning objectives, and a list of associated trainings.
Step 1) Go to the LMS
Step 2) Hover over “Catalog” on the main menu
Step 3) Select any training initiative
Step 4) Browse through a list of different trainings
How Do I Register for a Training?
Employees can register for a training by visiting the LMS homepage and navigating to the training catalog. They will have the option to choose from webinars, in-person, and online trainings. For webinars or in-person trainings, the employee will see a button that says, “Register.” For online or externally hosted trainings, the employee will see a button that says, “Take this Course.” Lastly, for trainings that have a specified class capacity, employees will see a message that says, “Join Waitlist.” They will have the ability to register for the course, but they will be sent directly to the waitlist, where the admin can either add the employee to the training or remove their entry.
Step 1) Go to the training catalog by selecting “Catalog” from the LMS homepage
Step 2) Search for and choose the training you would like to take
Step 3) Select “Register” or “Take this Course”
![]()
![]()
Step 4) Login to your account or create a new account
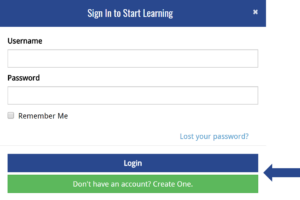
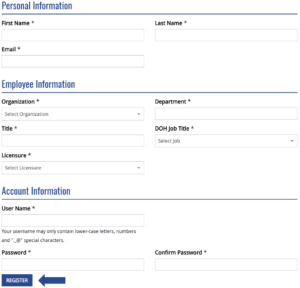
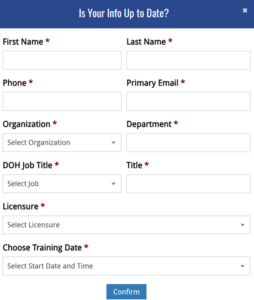
Step 5) Fill out the form with your employment information and click “Submit”
How Do I Create an Account?
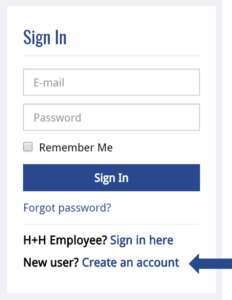
An employee can create an account in one of two ways. The first option is by visiting the OCH LMS homepage and selecting “Create an Account” under the sign-in section on the left. The second option is to register from the course page. An employee can do this by visiting the training center and accessing the course they would like to register for, which allows them to create an account and register for the training simultaneously.
Option 1:
Step 1) Select “Create an Account” in the LMS Welcome Section
Step 2) Complete all the registration form fields and click “Register”
Step 3) Upon successful completion, you will be signed in and redirected to the home page
Option 2:
Step 1) Go to the training catalog by selecting “Catalog” from the LMS homepage
Step 2) Search for and choose the training you would like to take

Step 3) Select “Register” or “Take this Course”
![]()
![]()
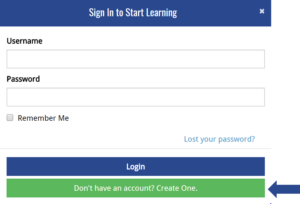
Step 4) Select “Don’t have an account? Create one”
Step 5) Completing the form on the course page will simultaneously create an account and register you for the course
How Do I Register for a Training that has Multiple Dates?
At the moment, there is no functionality that allows an employee to register for multiple sessions on the same course page. Employees will need to search for the same training, but under a different date. They can use the free text search fields to find matching trainings.
Step 1) Go to the training catalog by selecting “Catalog” from the LMS homepage
Step 2) Search for the specific name of the training via the free text search field on the right
Step 3) View all the dates available on the displayed courses by looking at the “Training Date”
Step 4) Register for as many trainings as you would like. (They will have the same title, but will be on separate pages)
Step 5) Select “Register” and fill out any missing information or create a new account
How Do I Join a Waitlist?
When an employee visits a training that has reached its max capacity, they will see a green button that says, “Join Waitlist.” By clicking this, the employee can still register for the training, but they will be sent to a waitlist (which can be found on the backend Admin dashboard).
Waitlist Registration Steps for Employee
Step 1) Go to the training catalog by selecting “Catalog” from the LMS homepage
Step 2) Search for and choose the training you would like to take
Step 3) Select “Join Waitlist”
![]()
Step 4) Login to your account or create a new account

Step 5) Fill out the form with your employment information and click “Confirm”
Step 6) You will see a message that says, “You have been added to the waitlist” and your entry will need to be approved by an admin in order for you to be officially registered for the training

How Do I Add or Remove Users from a Waitlist?
Admins can add or remove entries from the course waitlist. Adding the entry will add the employee to the training, and removing the entry will remove the employee completely.
Moving Employee from Waitlist to Training
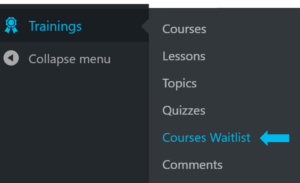
Step 1) Go to the backend of your OCH admin account and hover over “Trainings” on the right-side toolbar and select “Courses Waitlist”
Step 2) Select the waitlisted training from the course dropdown menu and select the session if applicable

Step 3) Select the employee you would like to add to the training

Step 4) Select “Add user to course”
Removing Employee from Waitlist
Step 1) Go to the backend of your admin account and hover over “Trainings” on the right-side toolbar. Select “Courses Waitlist”
Step 2) Select the waitlisted training from the course dropdown menu and select the session if applicable
Step 3) Select the employee you would like to remove from the waitlist
Step 4) Select “Remove User from Waitlist”
![]()
What Are the Different Account Roles?
There are three main account roles:
Admin: This account role has access to all back-end and front-end processes. The Admin can add and manage trainings without any restrictions.
Partner Admin: This account role is restricted by organization. For example, a partner admin can bulk register participants to a training for their own organization and they will also have access to all of the database entries associated with their assigned organization.
Subscriber (Employee): Subscribers (employees) have the most basic access and are able to register for various trainings and navigate through their user dashboard to view their progress and other important information.